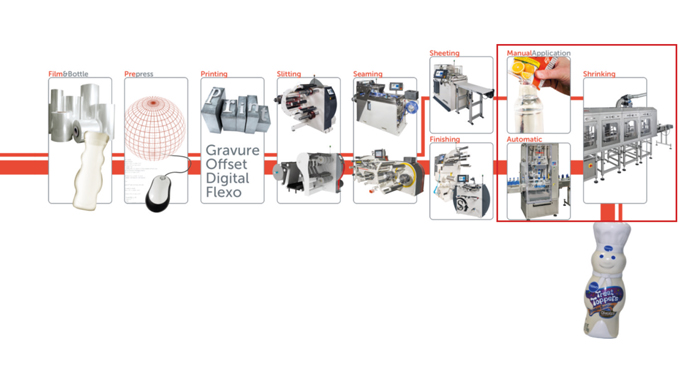
Figure 6.1 The shrink sleeve process - slitting, seaming, sheeting and finishing © 2017 Accraply, Inc
The layflat size and its tolerance – as well as the extent to which the layflat is over-sized relative to the container – is important because it determines the compatibility of both the container and the tooling on the application machinery with the shrink sleeve. The oversize is typically 2mm on a round container, but it may be as much as 7mm, depending on the container shape, size and the method of application.
The repeat length, or cut length, describes the length of the label being applied to the container. Each sleeve has a clear, non-printed area on the top and bottom. These clear areas are used for both manual and automatic application purposes. In manual application, the clear areas act as a guide for an automatic sensor to determine where to cut, or sheet, the individual sleeves. In automatic application, the clear areas also indicate where to cut the sleeve just prior to applying it onto the container. It is therefore always necessary to have these clear areas on any finished shrink sleeve.
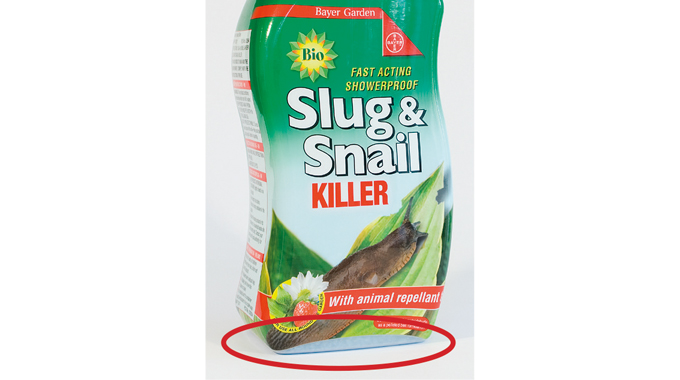
Let’s now return to the concepts of smiling and frowning (Figure 6.2). Smiling and frowning comes about when the sleeve shrinks in both the machine direction (MD) and the transverse direction (TD), and an arching effect is created.

Figure 6.2 An example of shrink sleeve frowning © 2017 Accraply, Inc
Fortunately, there are ways to overcome this issue. One method is to carefully select the type of film used and control for how the film shrinks into position on the container. Another method to control the issue of smiling and frowning labels is to incorporate machinery that lifts the container off the conveyor and allows the sleeve to shrink under the base of the container. Finally, a third method of mitigating smiling and frowning labels is through container design; specifically, either selecting or designing a container with a built-in notch to lock the sleeve label into place as it shrinks.
SHRINK SLEEVE LABEL TYPES
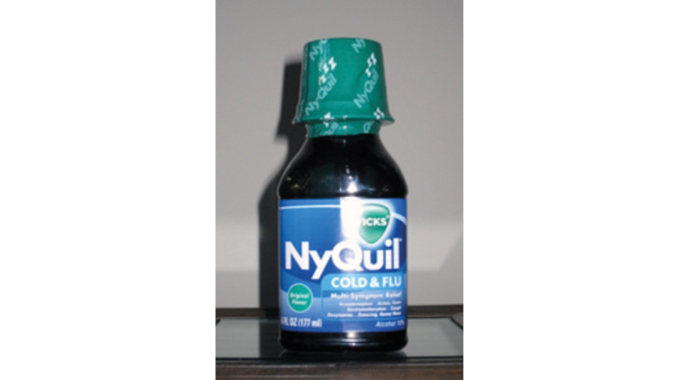
There are several types of shrink sleeves that brand owners seek for their products. Tamper evident or tamper bands (Figure 6.3) are used to produce a seal on a container that demonstrates tampering if the container is opened.

Figure 6.3 A tamper evident band © 2017 Accraply, Inc
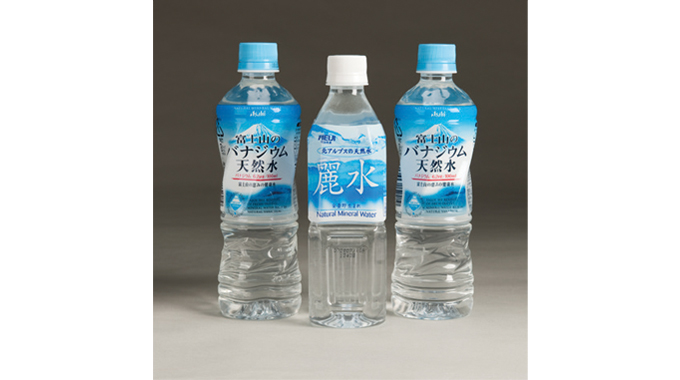
A part-body sleeve (Figure 6.4) is used when a container does not require a full-body decoration. A brand owner may require us to position a sleeve half way up a container or at the top of a container.

Figure 6.4 Examples of part-body sleeves © 2017 Accraply, Inc
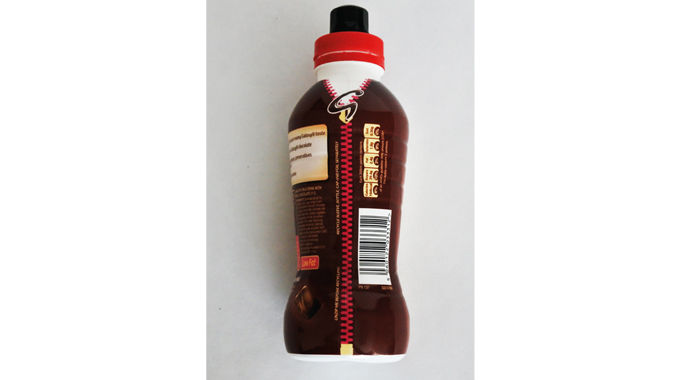
One of the challenges with positioning a part body sleeve half way up a container is that it becomes necessary to somehow anchor the sleeve in the right position on the container. Some of the containers in Figure 6.4 incorporate a notch, which allows the clear area to shrink into the groove and provide a nice finish.
Full body sleeves, on the other hand, allow for 360-degree and top-to-toe container decoration. No other labeling technology allows for almost 100% of the container’s surface to be decorated and used to convey the brand’s message to the consumer.
It is also possible to have full body decoration but with the added functionality of a perforation (Figure 6.5), which aids the consumer in removing the label following consumption. This feature can be achieved in the label application process, as well as during the converting process (which precedes label application). It is particularly straightforward to achieve on the application equipment, as the tooling involved is easily installed and generally provides a lot of flexibility in the positioning and pattern of perforation.

Figure 6.5 A full-body sleeve with perforation © 2017 Accraply, Inc
SHRINK SLEEVE LABELING PERFORMANCE CONSIDERATIONS
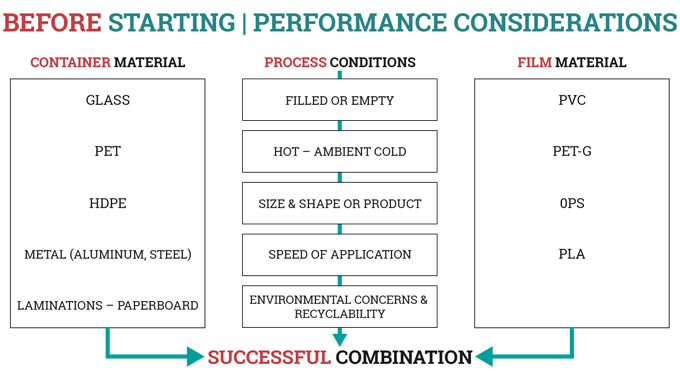
Achieving success in the final steps of applying and shrinking a shrink sleeve label hinges on decisions made at the very beginning of the process – decisions like what material the container will be made from and what film material was chosen for the sleeve. For example, glass containers present a very different scenario at the shrinking stage than do containers made from HDPE. Process conditions are important too – there are fundamental differences between shrinking onto a container that is full versus one that is empty.
Figure 6.6 captures some of the main variables that are in play as we set about applying and shrinking a finished shrink sleeve. Without the right combination of container type, film type and process conditions, a successful result will prove difficult to achieve. This, of course, assumes that all the other steps in the process have been completed with the appropriate focus on quality.

Figure 6.6 Key performance considerations associated with shrink sleeve labeling © 2017 Accraply, Inc
Container material considerations: Since glass is a heatsink, it can present challenges in the shrink tunnel by effectively stopping the film from shrinking evenly when the warm film comes in to contact with the colder surface of the glass. It is for this reason that glass containers are frequently pre-heated prior to applying the sleeve. PET containers, particularly if empty and lightweight, can be a challenge with regards to stability for sleeve application, and are susceptible to shrinking in the tunnel, along with the sleeve. On the other hand, HDPE containers expand in the tunnel – particularly when the containers are empty – and result in the sleeve shrinking around an expanded container, that then becomes loose-fitting after the HDPE contracts upon cooling. Metal containers behave similarly to glass in that they are a heatsink, while paperboards (as used for ice cream, for example) may require chilled conveyors and careful targeting of the heat in the tunnels to shrink the tamper band without melting the contents of the container!
Process conditions: The most fundamental starting point is with whether the container is filled or empty. Filled containers may be more stable on the line, but they may also have over-spill from the filling process that may require washing prior to sleeving. On the other hand, empty containers do not run the risk of over-fill contamination, but they do present greater instability on the line and have higher risks associated with their shrinkage or expansion in the tunnel. Filling temperatures can also present challenges. While ambient filling temperatures are generally straightforward, cold-filled products bring issues of condensation on the surface of containers, making it difficult to have sleeves slide down the container. Conversely, hot-filled products may cause the sleeve to pre-shrink on the container during application.
All the foregoing comments also have bearing on the film selection – with the advantages and disadvantages of each film type. Each of the three components is important to understand, because if there are issues with any one of the three elements, an inferior shrink sleeve label may result.
APPLICATION TECHNOLOGIES
Having understood that there are multiple container types, process conditions and film material combinations called for in the marketplace – and that ultimate success depends on selecting a combination of these three elements that are compatible with each other, let’s now review various options for applying the shrink sleeve label to the container. Essentially, there are three heat shrink sleeve application technologies available to us:
-
Rotational (carousel) systems
-
Direct apply systems
-
Mandrel systems (sometimes called bullet-style systems).
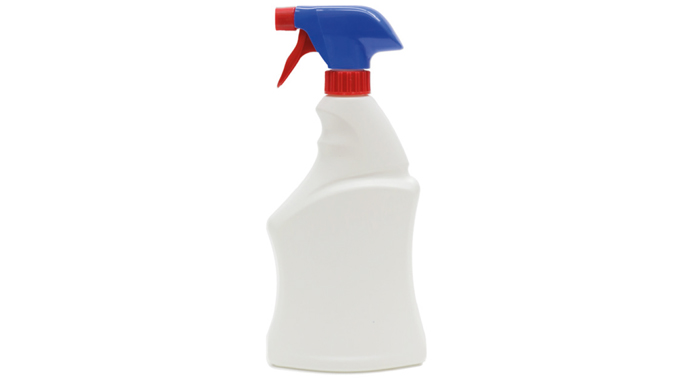
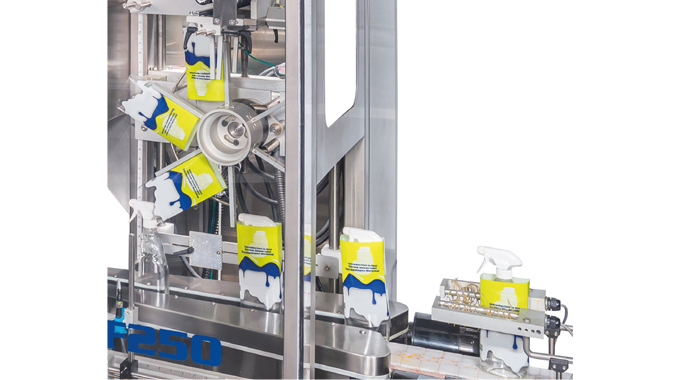
Carousel systems offer the advantage of facilitating a 'squaring' of the sleeves, which allows for better label placement, or rotational accuracy, on non-round containers. A carousel system will often be used to apply shrink sleeve labels to containers such as trigger bottles, like that pictured in Figure 6.7. The formation of square or rectangular sleeves prior to their application to non-round containers greatly increases the probability of the label panels being correctly positioned on the container after shrinking.

Figure 6.7 A trigger container
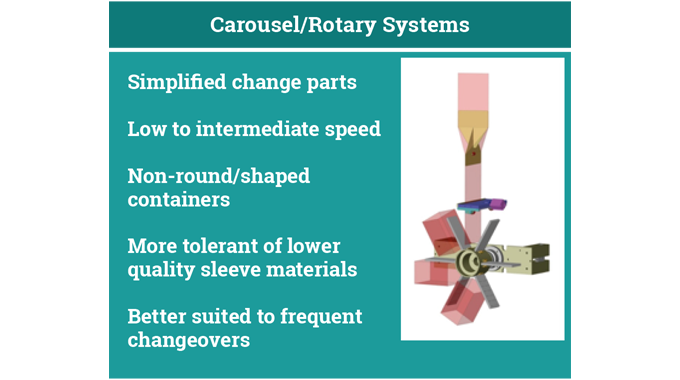
You will notice from Figure 6.8 that carousel application systems are more tolerant of lower quality sleeve materials. This tolerance can be attributed to the fact that the carousel tooling comes into contact with the sleeve significantly less than is the case with a mandrel or 'bullet' type application system, thus the tolerance and fit are less of a concern with a carousel application system.

Figure 6.8 A carousel (or rotary) shrink sleeve application system and its benefits © 2017 Accraply, Inc
Figure 6.9 shows a carousel applicator machine in operation. The carousel system shapes the sleeve in such a fashion that it is well-positioned or centered on the non-round container as it is applied.

Figure 6.9 A carousel sleeve applicator in operation © 2017 Accraply, Inc
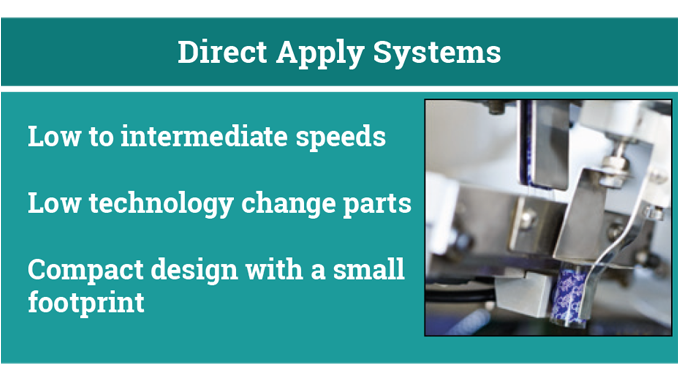
Direct apply systems are used primarily for tamper band applications. The process is simple: the sleeve passes through the tooling, where it is opened up into a round shape. As the container being sleeved moves along the conveyor, a guillotine cuts the sleeve, and it is dropped onto the container as it passes.
Direct apply systems (Figure 6.10) are very simple to use, they generally use low-tech change parts, and from an operator’s point of view, they offer simple and quick changeovers.

Figure 6.10 Direct apply systems © 2017 Accraply, Inc
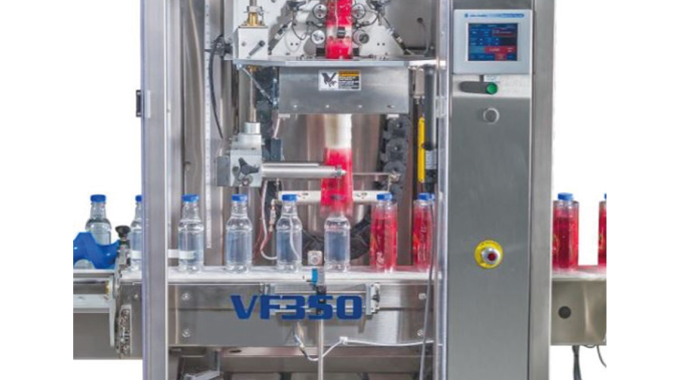
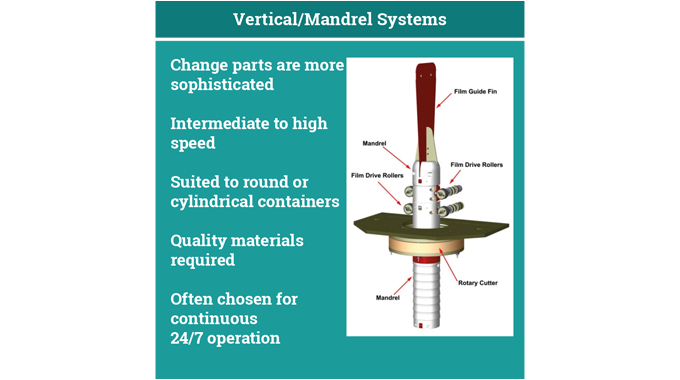
Mandrel (or bullet-style) application systems are the most widely used style of application systems in the market. This system uses a mandrel, or cylinder-like tube, around which the sleeve is opened (see Figures 6.11 and 6.12). The mandrel is suspended within a system of drive rollers that move the opened sleeve down the mandrel before the sleeve is rotary-cut to fall (or be driven) directly onto the moving container.

Figure 6.11 A vertical mandrel sleeve applicator in operation © 2017 Accraply, Inc

Figure 6.12 The vertical mandrel sleeve application system © 2017 Accraply, Inc
With this type of application, the mandrel comes into contact more extensively with the sleeve than does the tooling on a carousel application system. The layflat size tolerance – as well as the coefficient of friction (COF) characteristics of the inside of the sleeve – are much more critical on the mandrel style system than is the case with carousel or direct-apply systems.
With mandrel application systems, the speed at which the container is moving must be accurately timed with the mandrel as it fires the sleeve off and onto the container. It is for this reason that we use mandrel systems primarily for round or cylindrical containers as they present as better 'targets' for the sleeve as it is leaves the bottom of the mandrel, usually at high speed.
SHRINK TUNNELS
There are three main types of shrink sleeve tunnels:
-
Hot air
-
Radiant heat
-
Steam
This section will summarize the technologies available and discuss the advantages and disadvantages of each.
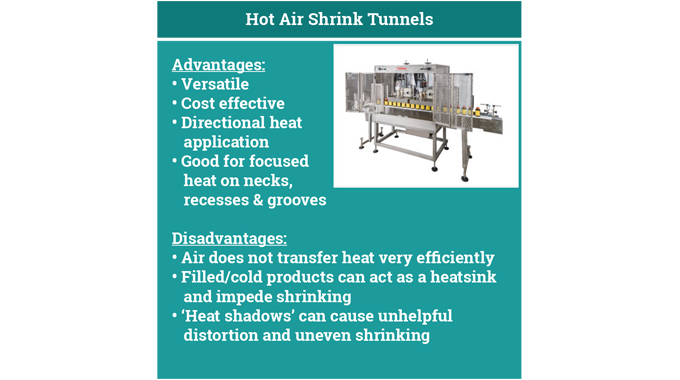
Hot air tunnels (see Figure 6.13) are versatile, they are cost-effective to use, and they can connect to almost any power source. Hot air tunnels offer directional heat, so depending on the type of equipment used, the many different manifolds in these systems enable heat to be focused on those areas of the container that require the most shrinkage. This makes them good systems for focused heating on necks, recesses and grooves.

Figure 6.13 Advantages and disadvantages of hot air shrink tunnels © 2017 Accraply, Inc
Hot air tunnels do have some disadvantages, however. Air is not a very efficient medium through which to transfer heat. Therefore, temperatures in hot air tunnels are generally higher to ensure enough heat is transferred to the film to start the shrink process. Because of the higher temperatures, the leading edge of the container – or more specifically, the sleeve on the container – can be over-exposed to heat as it enters the tunnel, resulting in an uneven shrink finish. This can be particularly prevalent with certain container types and process conditions, such as with cold-filled plastic or glass containers. One way to mitigate this issue is to rotate the container as it passes through the tunnel using a spinning conveyor.
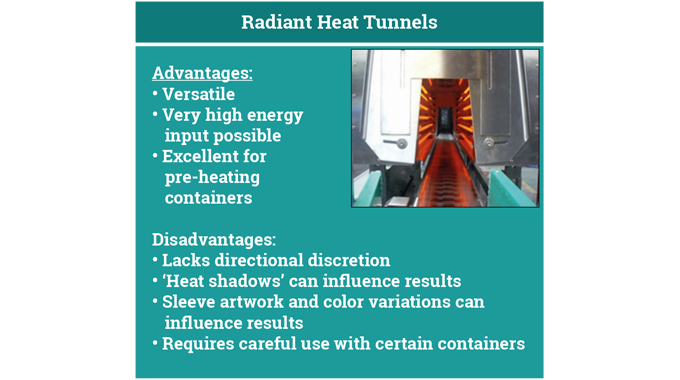
Radiant heat tunnels (see Figure 6.14) were primarily designed for preheating glass containers – prior to sleeving – to mitigate the heatsink effect of the glass. However, they can also be very effectively used to shrink sleeves. Radiant systems deliver infrared heat and because the heat remains in the chamber, they create an oven-like shrinking environment.

Figure 6.14 Advantages and disadvantages of radiant heat tunnels © 2017 Accraply, Inc
Due to their high temperature of operation, radiant heat tunnels represent a very harsh shrinking environment with little opportunity to direct heat toward specific areas on a container. Additionally, it can be particularly difficult to get even, consistent shrink results. For instance, when the leading side of the sleeve entering the tunnel gets aggressively shrunk before the trailing edge, or when the sleeve on the two sides of the container are exposed to more intense heat than the leading and trailing sides, a 'pulled' or uneven finished shrink sleeve may result. A further complication of the high temperatures in radiant tunnels is the difficulty they can present with empty containers. For example, the task of shrinking a PET sleeve on a thin-walled empty PET container can be extremely challenging in a radiant tunnel.
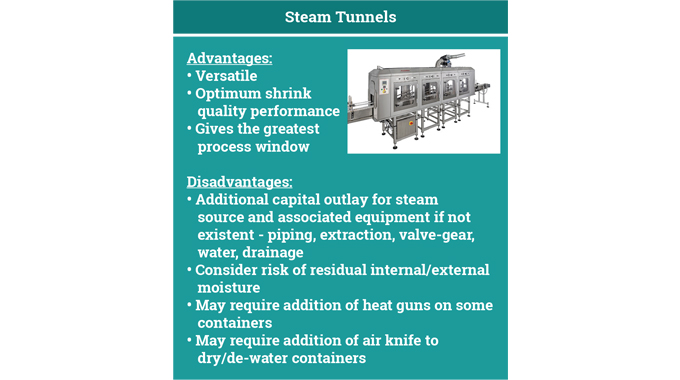
Steam tunnels (see Figure 6.15) are the preferred medium for most shrink sleeve applications, and they offer some significant advantages in terms of the process window. Steam tunnels are the most versatile type of tunnel and work well with a variety of films. Steam distributes heat very evenly to the entire surface of the film as it envelopes the container passing through the tunnel. And, because it is steam – and water is over 20 times more efficient at transferring heat than is air – temperatures are lower and the environment in the tunnel is much less harsh.

Figure 6.15 Advantages and disadvantages of steam shrink tunnels © 2017 Accraply, Inc
Despite steam tunnels being the most favored method of shrinking shrink sleeve labels due to their propensity to deliver the most even finished result, their initial installation is likely to be more involved and expensive due to the need for a steam generating boiler, as well as all the associated piping, extraction, valve gear and drainage required. The volume of steam – and hence the boiler requirements – will primarily be dictated by the volume of throughput required of the sleeving line.
It is common for containers to emerge wet from a steam tunnel. In situations where this presents a problem (e.g., with secondary packaging), air knives may be required to dry the containers.
In summary, this article has focused on the final steps in the shrink sleeve production process – applying the sleeve to a container, and shrinking it. As with all previous steps in the process, a focus on detail and a determination to make informed decisions and produce quality at each step throughout the process is essential to achieving perfection on the retail shelf. There are no one-size-fits-all solutions in the production of shrink sleeves as each container and each label produces its own set of challenges. Every decision that is made – right from the point of selecting the container shape and what material it will be made from – has influence on the best method of applying and shrinking that label at the end of the process. And, the earlier you involve your application and shrinking equipment manufacturer in the decision-making process, the greater your likelihood of success.